Salads
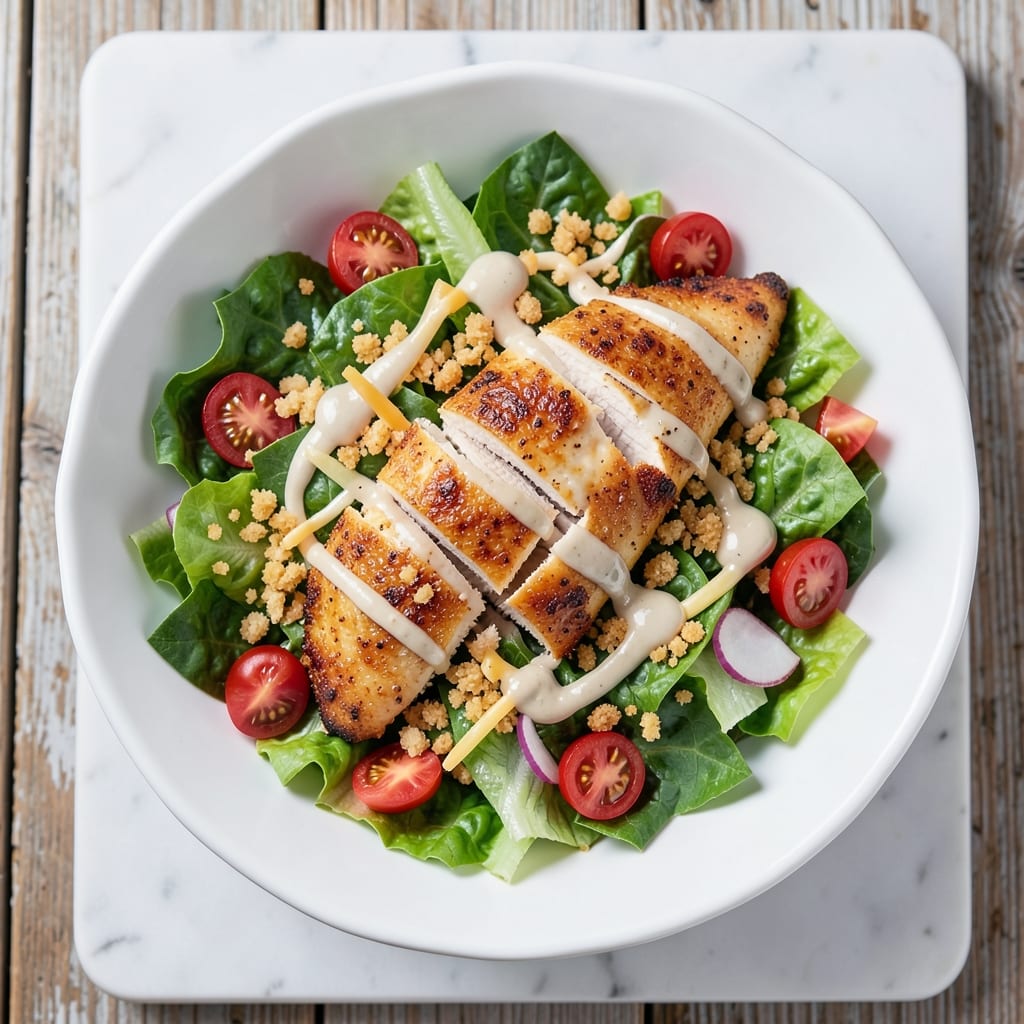
Applebee's Salad Recipe delivers that signature crispy chicken and creamy ranch harmony you crave—without the restaurant markup. 💛 The secret lies in perfectly seasoned chicken that stays crispy even after baking, paired with a tangy ranch that clings to every bite of mixed greens and crunchy croutons.
What sets this salad apart is the foolproof technique for achieving that signature Applebee's texture: a light breading on the chicken that crisps beautifully while staying tender inside. The creamy ranch dressing isn't just store-bought—it's a simple blend of mayo, buttermilk, and herbs that delivers that signature tangy richness.
By the time you assemble this salad, you'll have a towering pile of crispy chicken, fresh greens, melted cheese, and crunchy croutons—all perfectly balanced. The chicken stays crispy, the dressing remains creamy, and every bite delivers that familiar Applebee's flavor you love.
This recipe serves four with ease, making it perfect for weeknight dinners or meal prep. The best part? You'll have dinner on the table in under 30 minutes, with minimal cleanup. Let's recreate that restaurant-quality salad at home.
Ingredients for applebee's salad
Crispy chicken, creamy ranch, and fresh greens—just like Applebee's but better.
| Ingredient | Amount | Notes |
|---|---|---|
| Boneless, Skinless Chicken Breast 🍗 | 1 ½ lb | Cut into 1-inch strips |
| All-Purpose Flour 🌾 | ½ cup | For light breading |
| Panko Breadcrumbs 🍞 | ½ cup | For extra crunch |
| Granulated Garlic Powder 🧄 | 1 tbsp | For seasoning |
| Onion Powder 🧅 | 1 tbsp | For seasoning |
| Paprika 🌶️ | 1 tsp | Smoked for color |
| Salt 🧂 | 1 tsp | Kosher preferred |
| Black Pepper 🌶️ | ½ tsp | Freshly ground |
| Olive Oil 🫒 | 2 tbsp | For frying chicken |
| Mayonnaise 🥛 | ½ cup | For ranch dressing |
| Buttermilk 🥛 | ¼ cup | For ranch dressing |
| Dried Dill 🌿 | 1 tsp | For ranch dressing |
| Dried Parsley 🌿 | 1 tsp | For ranch dressing |
| Mixed Greens 🥬 | 6 cups | Romaine or spring mix |
| Shredded Cheddar Cheese 🧀 | ½ cup | Medium sharp preferred |
| Croutons 🍞 | ½ cup | Store-bought or homemade |
The chicken is the star here, and Panko breadcrumbs make all the difference for that signature crunch. Grab the Panko from Trader Joe's—it's lighter than regular breadcrumbs and stays crispy. For the mayo and buttermilk, Hellmann's and Land O'Lakes are my go-tos, but any good-quality brands work. The mixed greens? Romaine holds up best under the weight of toppings, but spring mix is perfect if you want extra color. Look for shredded cheddar in the deli section—pre-shredded gets clumpy and melts poorly.
No Panko? Crush up regular saltine crackers—they work in a pinch. Short on buttermilk? Mix 1 tbsp lemon juice or vinegar with 1/4 cup milk to mimic it. The ranch dressing can be made ahead and stored in the fridge for up to 5 days—just give it a good stir before using. For the chicken, boneless, skinless breast is easiest, but thighs work too if you prefer juicier bites. Just bake them 10 minutes longer. The croutons? Toast your own with a drizzle of olive oil and seasoning if you want extra flavor—otherwise, store-bought is totally fine.
This salad keeps well for 2 days in the fridge, but the chicken loses its crispiness after a day. Store the dressing separately and toss it in right before serving. For meal prep, keep the dressing and toppings in containers and assemble when ready to eat. The chicken stays crispy for 1 day if stored in an airtight container—just reheat in the oven at 350°F for 5 minutes to revive the crunch. Double the batch and freeze half for a quick lunch later.
Why You'll Love This Recipe
- Crispy in Minutes: I swear, the panko crust on that chicken is the best shortcut I’ve found. Just flour, garlic powder, and onion powder—no fancy marinades—then a quick fry or bake, and you’ve got that addictive crunch. My kids still think it’s "fancy" restaurant food, even though I’m the one making it.
- Restaurant-Style Crunch: That garlic-onion panko crust? It’s what makes this taste like Applebee’s, not just some sad copycat version. The secret’s in the double-dip—flour first, then panko—so every bite has that golden, buttery crunch without the grease. Honestly, I’ve tried cheaper breadcrumbs, but this is the only one that delivers.
- Lunchbox Hero: Between us, this is my go-to for meal prep. Toss the crispy chicken over greens, or pack it cold in wraps—it stays crispy for days if you wrap it right. My daughter takes hers to school, and she’s not the only one begging for leftovers. (Yes, even on a Tuesday.)
- Budget Crispy Magic: You’d be shocked how cheap this actually is. A few chicken breasts, a bag of panko, and spices you already own—no specialty ingredients, no markup. I’ve made this for game nights, potlucks, and lazy Sundays, and it’s always the dish people ask for seconds on. Not the prettiest, but the taste makes up for it.
Step-by-step instructions for crispy chicken and creamy ranch salad
Here's how to recreate that perfect Applebee's balance of crunchy chicken and velvety ranch.
🍳 Step 1: Bread the Chicken for Maximum Crunch
Cut the 1.5 lb boneless, skinless chicken breast into 1-inch strips—this size ensures even cooking and maximum crispiness. In a shallow bowl, whisk together the 0.5 cup all-purpose flour, 1 tbsp granulated garlic powder, 1 tbsp onion powder, 1 tsp paprika, 1 tsp salt, and 0.5 tsp black pepper. This dry rub will create that signature golden crust.
Dip each chicken strip into the flour mixture, pressing gently to adhere the seasoning. Then transfer to a separate plate and dredge in the 0.5 cup panko breadcrumbs, again pressing lightly to ensure even coverage. The panko will give you that satisfying crunch you love from the restaurant. Let the breaded strips sit for 5 minutes while you prep the next step—this resting time helps the coating stick better.
🔥 Step 2: Cook the Chicken Until Golden and Crispy
Heat 2 tbsp olive oil in a large skillet over medium-high heat until shimmering. Add the breaded chicken strips in a single layer—don't overcrowd the pan, or they'll steam instead of crisp. Cook for 3-4 minutes per side until the chicken reaches an internal temperature of 165°F and the breading turns a deep golden brown. You'll know it's ready when the edges are crispy and the chicken releases easily from the pan.
If the breading starts to brown too quickly but the chicken's not done, reduce the heat slightly. The goal is crispy exterior with juicy interior. Transfer the cooked chicken to a paper towel-lined plate to drain excess oil, then tent loosely with foil to keep warm while you assemble the salad.
👨🍳 Step 3: Whip Up the Creamy Ranch Dressing
In a medium bowl, whisk together the 0.5 cup mayonnaise, 0.25 cup buttermilk, 1 tsp dried dill, and 1 tsp dried parsley until smooth and fully combined. This is where the magic happens—the buttermilk cuts through the richness of the mayo, creating that perfect tangy creaminess. Taste and adjust seasoning with a pinch more salt or pepper if needed. The dressing should be thick enough to coat the back of a spoon but still drizzle nicely.
Here's the thing—this dressing needs time to meld. Let it sit for 5 minutes while you finish the salad components. The flavors will deepen and become more cohesive, giving you that restaurant-quality taste. If it thickens too much, whisk in 1-2 teaspoons of milk to reach your desired consistency.
🥘 Step 4: Assemble the Perfect Salad
In a large bowl, combine the 6 cups mixed greens, 0.5 cup shredded cheddar cheese, and 0.5 cup croutons. Give it a gentle toss to distribute everything evenly. The greens should look vibrant and fresh—if they're wilted, add a splash of cold water and toss again before proceeding. This is your canvas, so make sure it's looking its best before adding the star components.
Drizzle about ⅓ of the ranch dressing over the greens and toss lightly to coat. Then add the crispy chicken strips and gently fold them in. The heat from the chicken will help the dressing warm up slightly, enhancing all those wonderful flavors. Divide the salad among 4 plates and drizzle with the remaining ranch dressing just before serving.
Pro Tips For Making Applebee'S Salad
- BRINE THE CHICKEN: Toss those skinless breasts in ice water with 1 tablespoon salt per quart for 30 minutes before breading—it keeps them juicy even after frying. I learned this the hard way after serving dry, rubbery chicken that tasted like regret.
- PANKO CRUST TRICK: Mix the panko with 1 teaspoon garlic powder and onion powder before adding it to the chicken—this ensures even seasoning instead of just dusting the top. Yes, it’s an extra step, but the flavor pays off.
- SKIP THE OVERCROWDING: Fry the chicken in small batches—3-4 pieces at a time max—or the oil temp will drop, giving you soggy, unevenly cooked breading. I used to rush this and ended up with a greasy, sad mess.
- REST BEFORE SLICING: Let the fried chicken sit 5 minutes under foil after frying—this locks in moisture so it doesn’t turn dry when sliced for the salad. I know, I know, but trust the process.
Essential equipment for perfect results
Skillet Essentials
You’ll need a 10-12 inch cast-iron skillet for that perfect crispy chicken—its heavy base distributes heat evenly and retains it well. I love my Lodge Pre-Seasoned Cast Iron Skillet because it’s already seasoned and ready to use. If you don’t have cast iron, a non-stick stainless steel skillet like All-Clad works too, but monitor the heat closely to avoid sticking. 🔥
Breading Station Setup
Set up two shallow bowls for the breading process: one for the flour-seasoning mix and another for the Panko breadcrumbs. Use small plates (about 8x10 inches) to hold the breaded chicken while it rests. I keep a wire whisk handy for stirring the flour mixture and a pair of tongs for flipping the chicken in the skillet—this prevents overcrowding and maintains crispiness. 🍗
Dressing Tools
For the ranch dressing, grab a medium mixing bowl (I use Pyrex glass) and a whisk—whisks distribute ingredients more evenly than forks. A small measuring cup helps with precise buttermilk and mayo measurements. Store any leftover dressing in an airtight container (like Rubbermaid FreshWorks) to keep it fresh for up to 5 days. ✨
Salad Assembly Gear
Use a large salad bowl (at least 3 quarts) to toss the greens, cheese, and croutons—Vitamix or Pyrex bowls work great. A spatula helps distribute the dressing evenly without crushing the greens. For plating, I recommend 6-inch dinner plates to showcase the salad’s height and layers. Keep a small bowl nearby for extra dressing to drizzle at the table. 🥗
Optional Upgrades
For extra crispiness, try an instant-read meat thermometer (like ThermoWorks Thermapen) to check the chicken’s internal temperature—165°F is perfect. A salad spinner revives wilted greens in seconds. If you’re meal prepping, quart-sized mason jars let you layer ingredients separately for freshness—dressing on the bottom, greens in the middle, and toppings on top. 💡
Nutrition facts
Frequently asked questions
Can I make this salad ahead of time?
but with a few key adjustments! Store the dressing separately and toss it in just before serving. Assemble the salad (without the chicken) up to 2 days ahead—keep it refrigerated. For the chicken, cook it fresh and add it to the salad right before eating to maintain that signature crispiness. If you must prep ahead, store the chicken separately and reheat it in the oven at 350°F for 5 minutes before adding.
What if I don't have Panko breadcrumbs?
No problem! Crush up regular saltine crackers into fine crumbs to replace Panko. For extra crunch, toast them lightly in the oven at 350°F for 5 minutes before using. The flavor will be slightly different but still delicious. If you're in a real pinch, even crushed cornflakes or Ritz crackers work in a bind.
How do I keep the chicken extra crispy?
The secret is in the cooking method! Use medium-high heat and avoid overcrowding the pan. Cook the chicken in a single layer, and flip only once. After cooking, place the finished strips on a wire rack over a baking sheet—this allows air to circulate and keeps them crispy. If reheating, use the oven (not microwave) at 350°F for 3-4 minutes to revive the crunch.
Can I use a different type of cheese?
Yes, but the flavor will change slightly. For the closest match, use medium sharp cheddar. Other good options include Monterey Jack (milder) or Pepper Jack (for a kick). Avoid pre-shredded cheese—it gets clumpy and melts poorly. If you're feeling adventurous, try Gouda or Swiss for a unique twist.
What's the best way to make this salad gluten-free?
Swap the regular flour for gluten-free all-purpose flour and use certified gluten-free Panko or crushed gluten-free crackers. For the croutons, use gluten-free bread or omit them entirely. Double-check all seasoning blends (like garlic powder) to ensure they're gluten-free. The ranch dressing is naturally gluten-free as written.